How and where do you insert an SD card into your Nintendo Switch?
Would you like to know how and where to insert an SD card into your Nintendo Switch? Here we’ll show you how it works.
The memory of a Nintendo Switch can be quickly expanded using a microSD card. However, you may not be able to find the SD card slot at first glance. Depending on the Switch model, it is in a slightly different place and is sometimes hidden under a small flap. We have summarized what else you should consider when expanding your Switch memory in this article.
Note: No matter what model you have, you should turn off the console completely before inserting the SD card. To do this, press and hold the power button until you see various options. You can then select “Power Off” to completely shut down your console.
- Nintendo Switch
- Nintendo Switch (classic model)
- Nintendo Switch Lite
SD card slot on the Nintendo Switch OLED
The latest model from the Nintendo Switch family is the OLED Switch. Here you will find the SD card slot on the back of the console. The best way to do this is to place the console with the screen facing down on a clean surface. Now you can fold up the panel at the bottom. This not only serves to hold the console upright, but also hides the slot for your memory expansion. The slot is on the left side. Insert the microSD card with the label facing up until you hear a click. The card is then fully engaged. To remove it again, press the SD card a little further inward. This loosens it and it should spring out of the holder on its own.
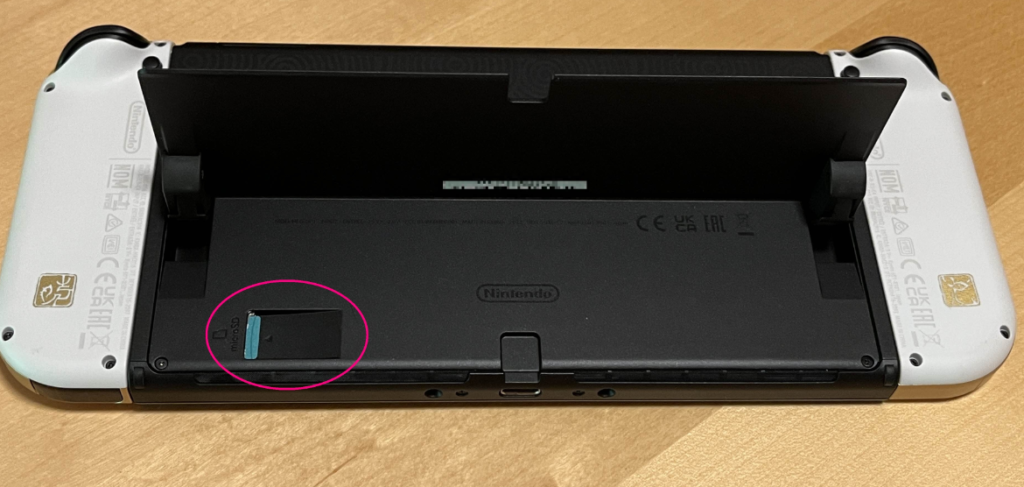
You can open the lower half of the OLED switch to insert an SD card.
SD card slot on the Nintendo Switch (classic model )
To expand the memory of your Switch, ideally turn the console over so that the screen is at the bottom. Make sure that the surface is clean so that the screen does not get scratched. On the left side of the console, you can then open a small flap by simply pulling it upwards. This flap is usually intended as a stand for your console. Here you will then see the SD card slot directly. Insert the microSD card with the labeled side facing up. As soon as you hear a click, the card is properly locked in. To remove the additional memory, press on the card. It should then protrude far enough from the console so that you can pull it out without resistance.
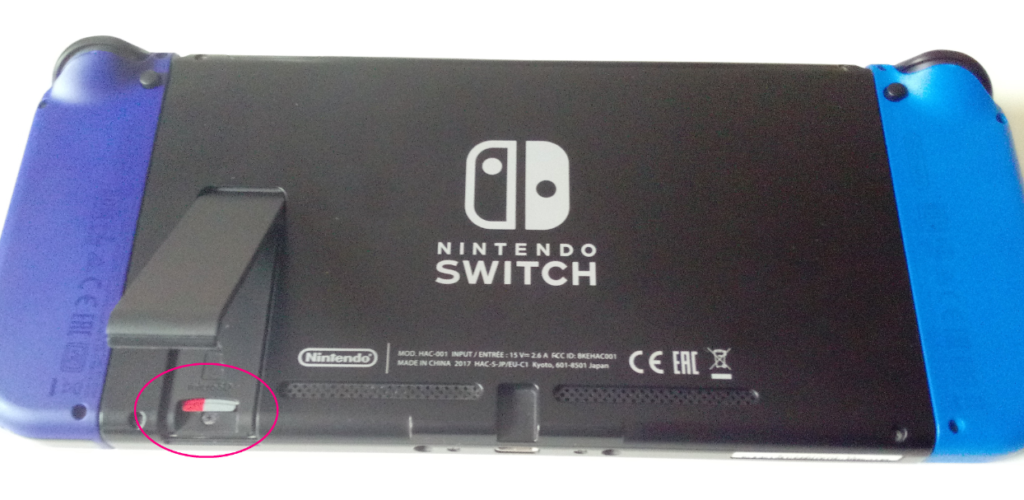
On the classic Nintendo Switch model, you can open a flap on the left side of the back to insert the SD card.
SD card slot on the Nintendo Switch Lite
On the Switch Lite, you will find the SD card slot at the bottom right. There is a small flap that is also labeled “microSD”. At the top you will find a small indentation so that the flap can be opened more easily. Pull it out and insert the SD card so that the label is facing the bottom of the console. As soon as the card is properly seated, you will hear a short clicking sound. To remove the card again, you have to press on the SD card. The microSD memory will then pop out.
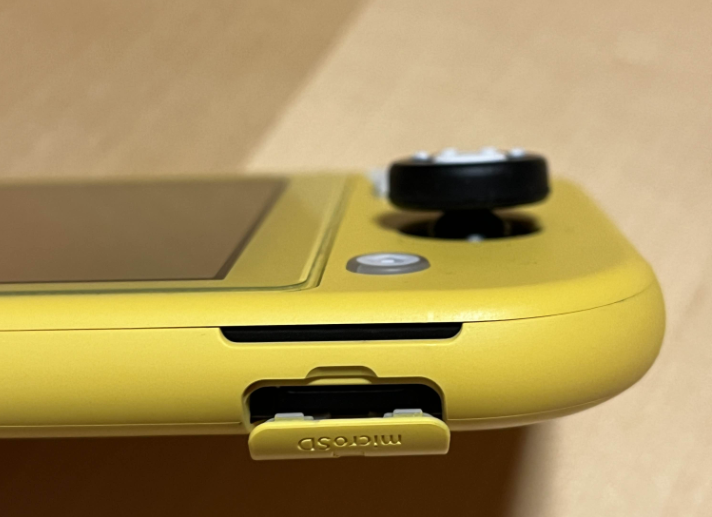
The Switch Lite has its own small compartment for the SD card. You will find it at the bottom right of the console.
- Charging Nintendo Switch controllers – these are the options
- Nintendo Switch: Setting up and changing Wi-Fi
- Nintendo Switch Online – Advantages and costs at a glance

